

We've all mashed our fingers on a piano, thinking we're creating something amazing (of course you are!). Ok, maybe that's just me. Today, I thought it'd be cool if we created a piano using HTML & JS all with the help of a great libary called Tone.js!
Getting started
We'll be writing code in Repl.it today! It's an online code editor, think of it a bit like the Google Docs for coding! During this workshop, I want to focus on the JavaScript that runs the project, so I've prepared a starter for you to use. Head on over to this starter code.
Let me just quickly explain the starter code. In there you will find three files: index.html, style.css and script.js. The JavaScript file is currently empty, on the other hand the rest of the files have been set up to create a basic UI.
At the top of index.html we reference our stylesheets and metadata. To make styling super easy, I've also added GitHub’s Markdown CSS file.
<body class="markdown-body">
<div>
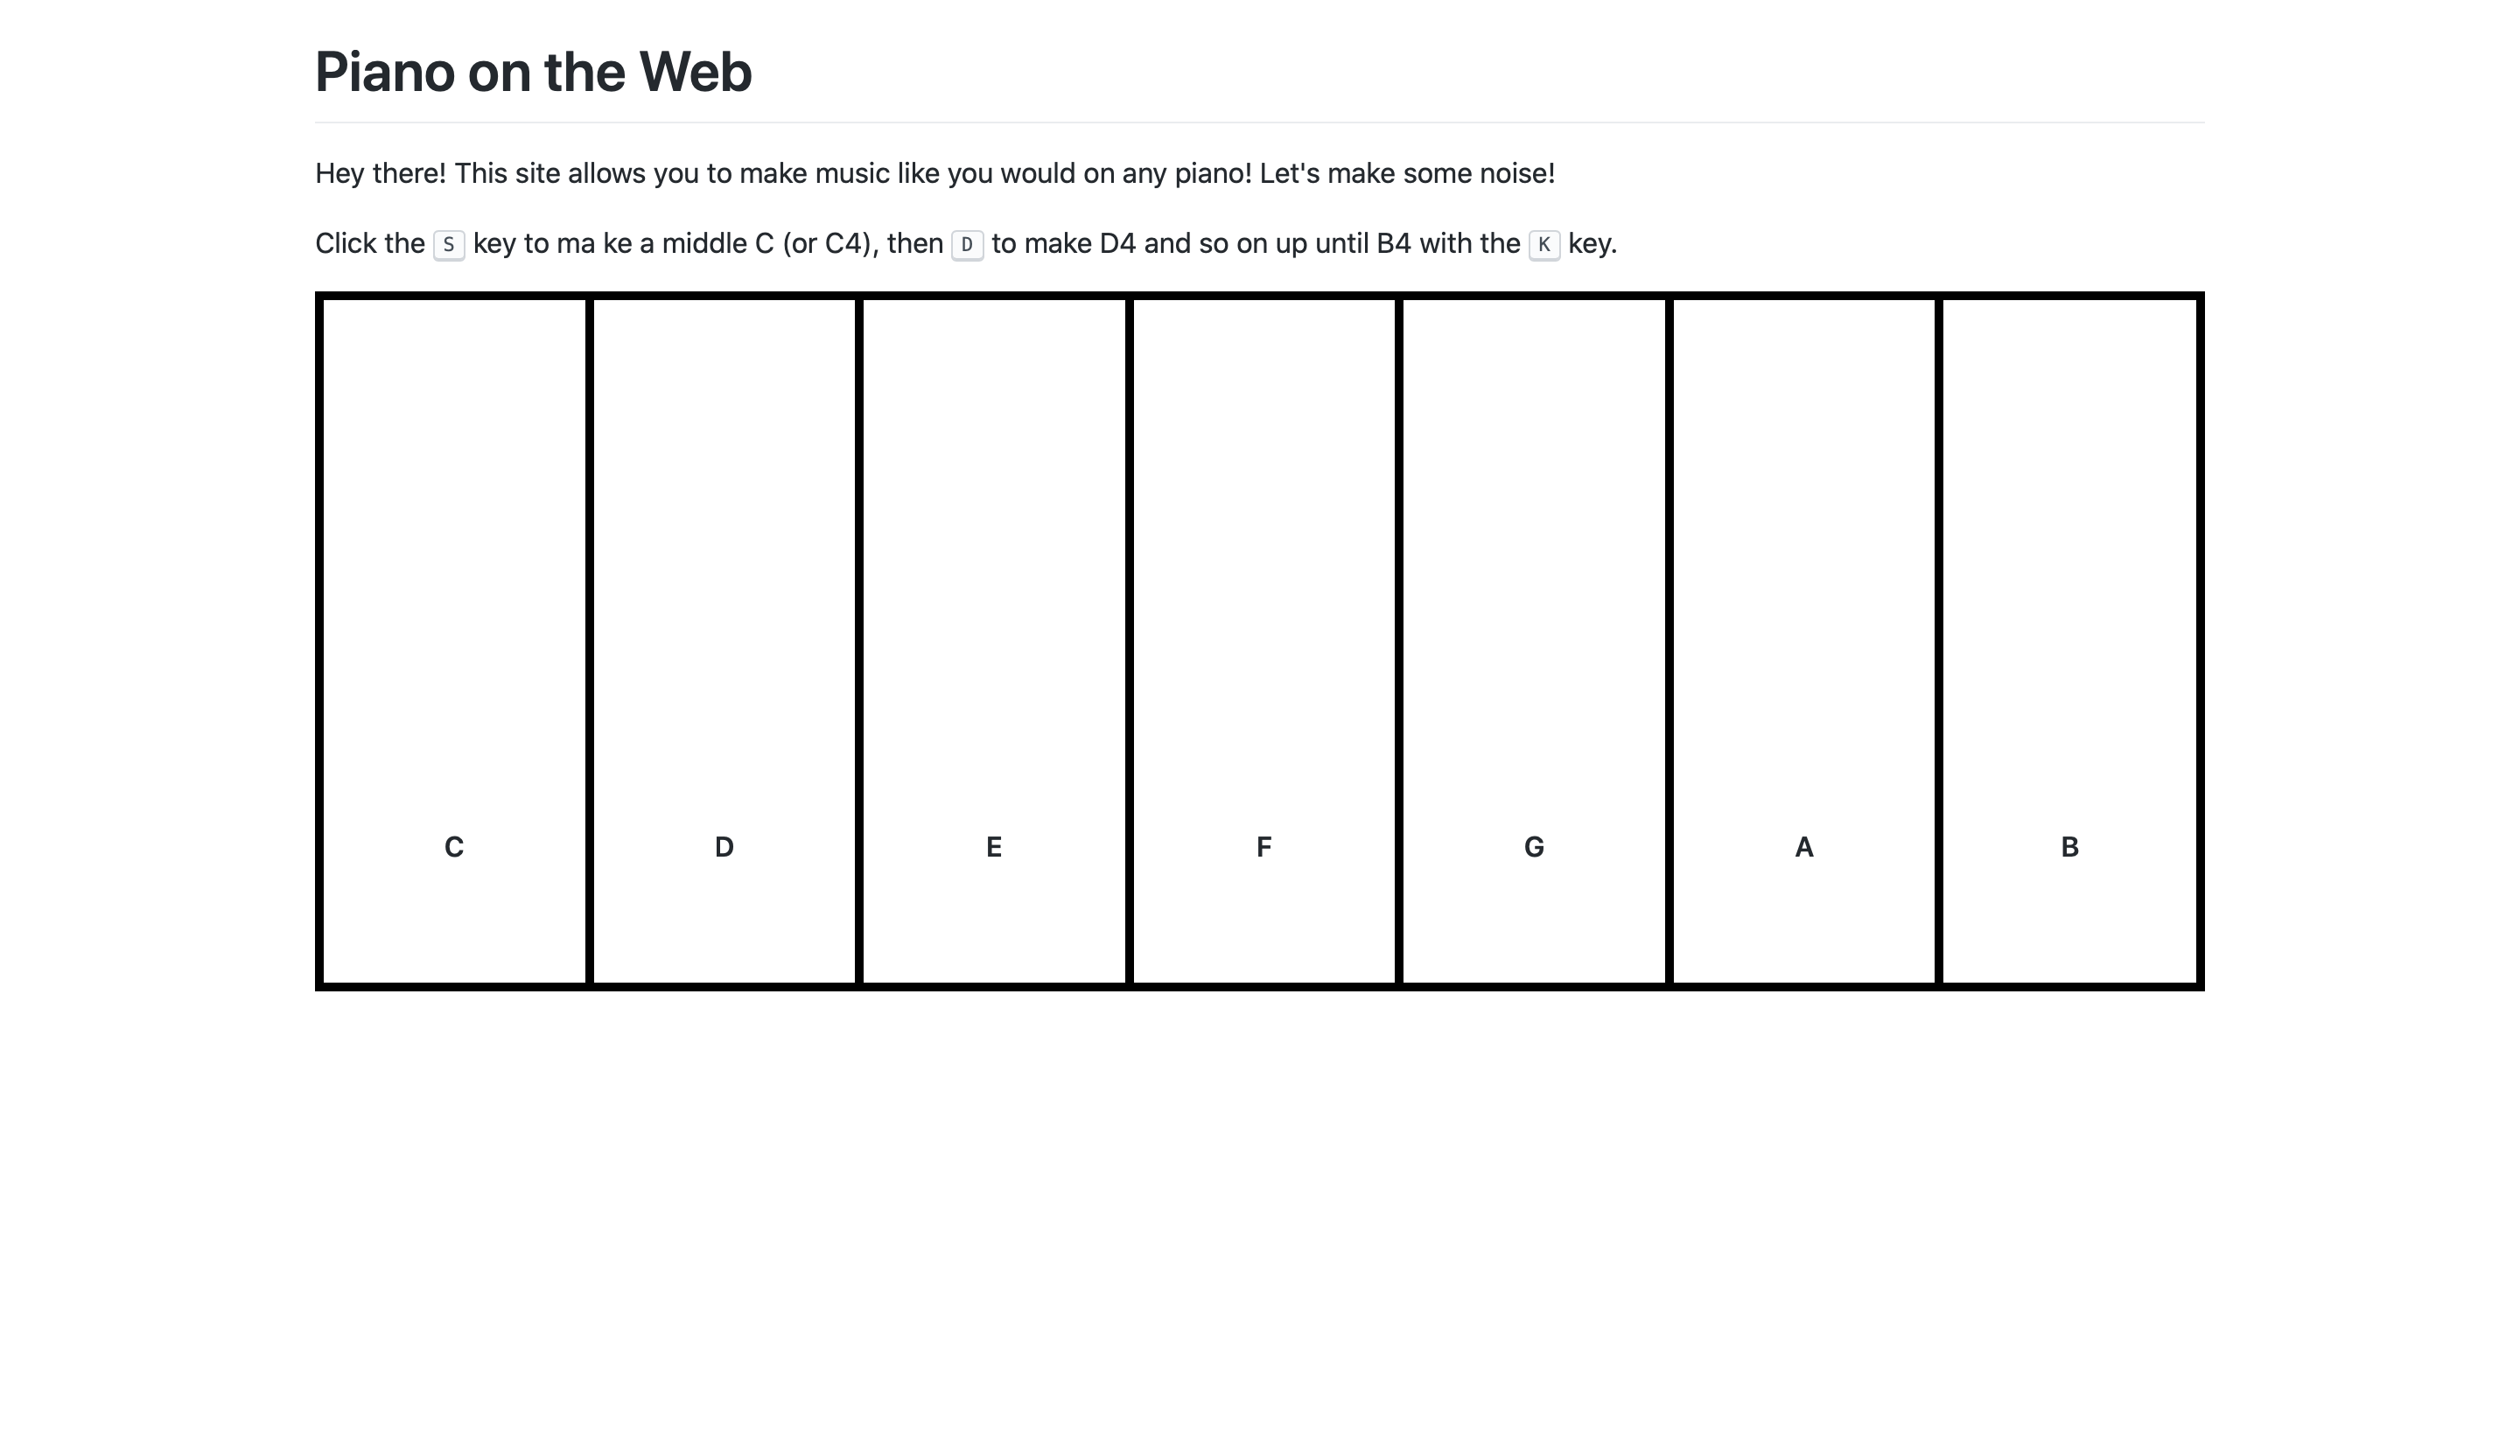
<h1>Piano on the Web</h1>
<p>
Hey there! This site allows you to make music like you would on any piano!
Let's make some noise!
</p>
<p>
Click the <kbd>S</kbd> key to make a middle C (or C4), then
<kbd>D</kbd> to make D4 and so on up until B4 with the <kbd>K</kbd> key.
</p>
</div>
<div id="piano">
<span class="key" id="C"><strong>C</strong></span>
<span class="key" id="D"><strong>D</strong></span>
<span class="key" id="E"><strong>E</strong></span>
<span class="key" id="F"><strong>F</strong></span>
<span class="key" id="G"><strong>G</strong></span>
<span class="key" id="A"><strong>A</strong></span>
<span class="key" id="B"><strong>B</strong></span>
</div>
<script src="https://cdnjs.cloudflare.com/ajax/libs/tone/14.7.52/Tone.js"></script>
<script src="script.js"></script>
</body>
I'll quickly break this down. The class applied to the <body> tag ensures that the Github Markdown styles are applied. Then in the first <div> tag we provide a basic introduction to the site. Then in the second div there are a span element for each key we will be using. Then at the end, we add all of our Javascript scripts. Let me break down the CSS file:
body {
  width: 75vw;
  margin: auto;
}

#piano {
  height: 400px;
}

.key {
  height: 400px;
  width: 14.2857142857%;
  float: left;
  border: 5px solid black;
  border-right: none;
  background: white;
  text-align: center;
  padding-top: 300px;
}

#B {
  border-right: 5px solid black;
}
First, the body tag is set to have a width and centered using margin: auto;. Secondly, we set the #piano div to have a height of 400px. As there is very little content in the keys, this will make sure they are big and look realistic. Next we make each key have the correct height, have a width of one seventh of the div, it has a border and a background of white. Lastly, the B key will have a right border as it comes at the end.
I hope you understand the starter, now you may be getting bored so let's get making!
Detecting a key press
From here on out, we'll be writing our code in the script.js file so load that up in the editor.
To play a note in our project we will have the user press a key on their keyboard. Javascript has an event for this: document.onkeydown. This is fired when ever a key is pressed down.
For example, in the below snippet:
document.onkeydown = function (e) {
  console.log('Key pressed!')
}
Whenever a key is pressed it will log 'Key pressed!'. You can try it too! Just type this into your script.js file, click 'Run', then click the browser preview and press a key. You should see the logs in the console.
The next step is knowing what key we pressed, we want to get a bit more info to do that. We can do this with the following snippet. Building on top of our previous function, we are now getting data from the browser through the event. In this data we get a keyCode this can be used to identify the key that was pressed. The snippet gets all the information from the event that fired the function.
document.onkeydown = function (e) {
  e = e || window.event
  var key = e.which || e.keyCode
  console.log(key)
}
What this code does is it get's the event (the key being pressed) information happening. It then extracts the key code from that information. The use of || is as a browser fallback as some browsers have different APIs.
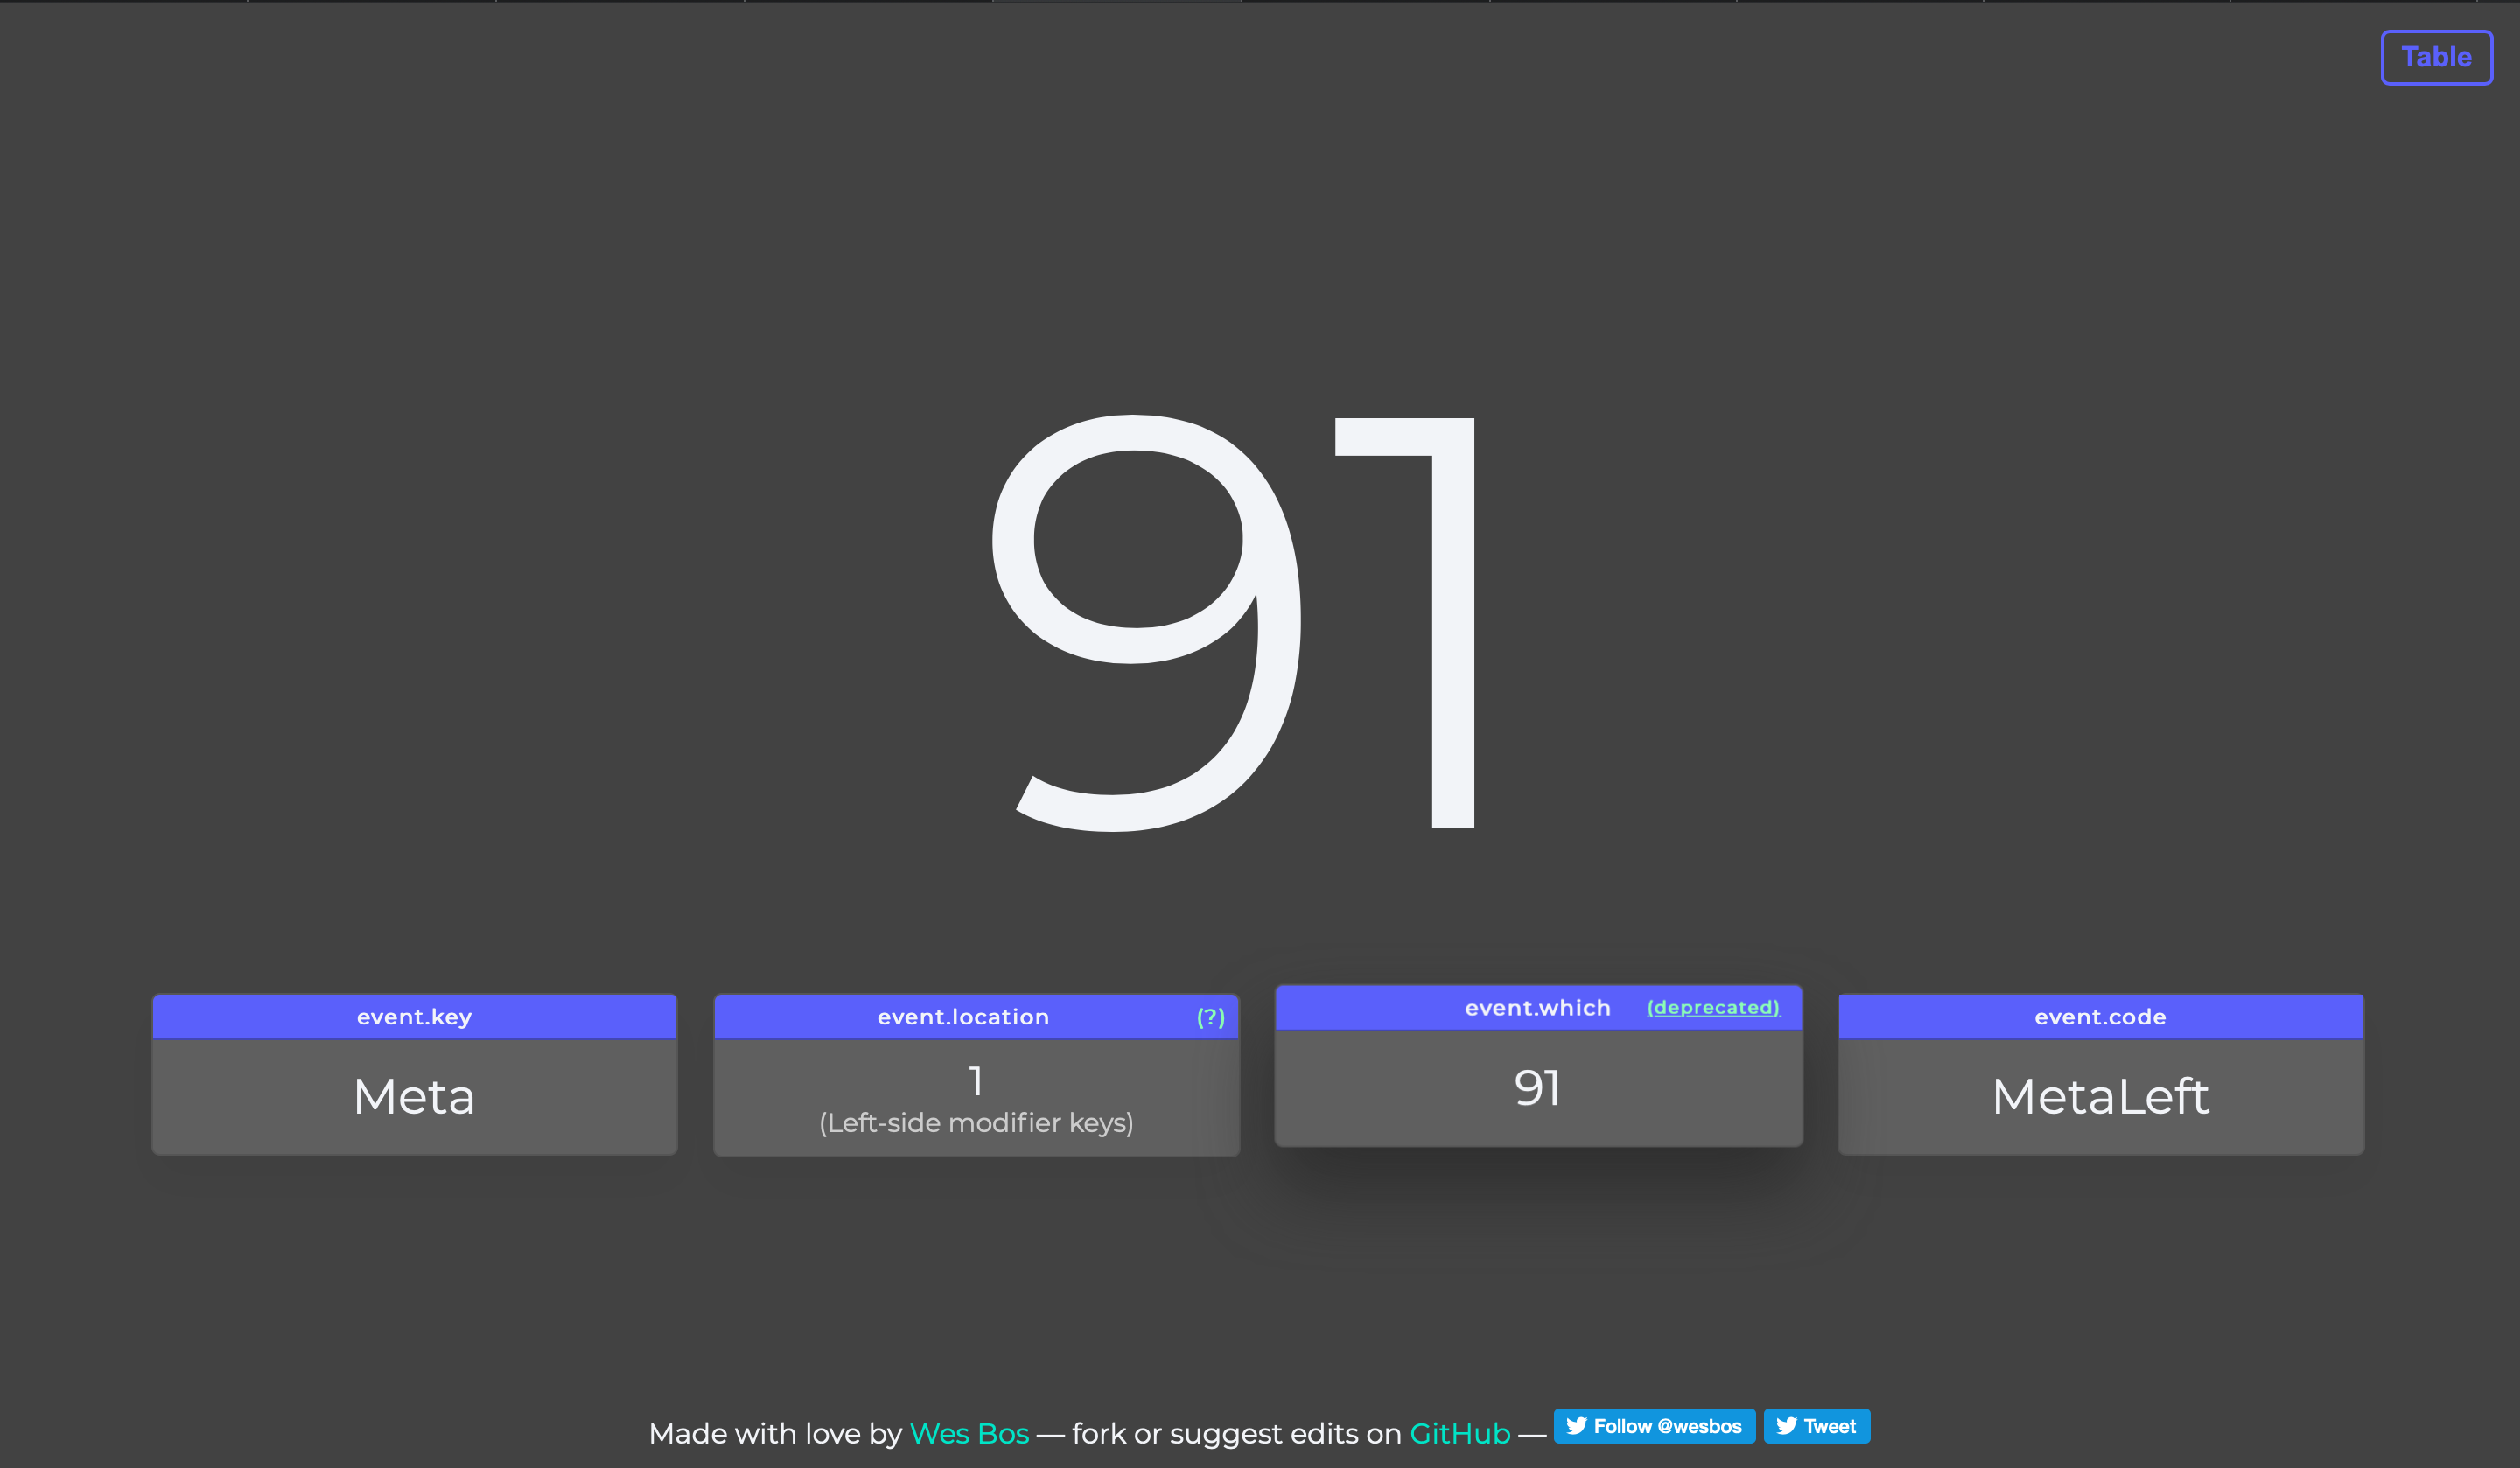
You'll see that when running this, our key is a number!? That's because each key has it's own code. keycode.info is a super handy tool to help you identify the codes for each key.
Now that we know how to identify the key, let's only log the event if it is the s key. It's keycode is 83 We'll use an if/else statement for this.
document.onkeydown = function (e) {
  e = e || window.event
  var key = e.which || e.keyCode
  if (key === 83) {
    console.log('S had been pressed')
  }
}
We've done it!
Playing a sound
Now it's time to play a sound with Tone.js! First let's start up Tone.js, add the following to the top of the Javascript file:
Tone.start()
const synth = new Tone.Synth().toDestination()
This starts up Tone.js and then creates a synth for us to play a note.
We're going to do this in a Javascript function, to make our clean.
function playNote(note) {
  synth.triggerAttackRelease('C4', '8n')
}
Here's how we create a function. The name of our function will be playNote and it will need a variable called note to be provided when the function is called. Then inside of that function, it plays the C4 key for the duration of 8 notes.
However, we aren't using our note variable. Let's use this. We're going to add it in using template strings (or template literals). Template strings allow us to add variables into our strings. To do this we use the ` character instead of '.
Then whenever we want to use a variable like note, we can do: ${note}
Putting this together, we can make:
function playNote(note) {
  synth.triggerAttackRelease(`${note}4`, '8n')
}
The 4 is kept as this defines, the section of the keyboard. At the moment, we'll keep that the same.
Now let's go back to our keyboard pressing event. Let's have it trigger this new function we've made.
We can do this by replacing console.log('S had been pressed') with playNote('C').
Test it out! When you click the S key you should hear the Middle C note!!
Now can you replicate this?
- D should play the D note.
- F should play the E note.
- G should play the F note.
- H should play the G note.
- J should play the A note. (Yes pianos start at C...)
- K should play the B note.
Remember, you can use keycode.info.
Making the UI interactive
How will the person know the key they clicked? Let's give them some visual confirmation! We've got each key in a seperate element so let's change the background of the key when it's hit. We can do by adding this line to our playNote function:
document.getElementById(note).style.background = '#33d6a6'
What this does, is it gets the element with the ID of the note variable. If you see above, I set the ID of each <span> to be the same as their corresponding note. It then sets the background to be Hack Club GreenTM or #33d6a6.
Run it! What happens?
They keys turn green, but it stays green!!!! NOOOOOO..... We've got to change this, let's add this line of code:
setTimeout(() => {
  document.getElementById(note).style.background = 'white'
}, 200)
This will return the background to white after 200 milliseconds.
AND we've done it! Well done my friend.
Going beyond!
We've built a basic project, now let's make it EPIC! I'm handing over control to you, but I'd like to give you some inspiration:
- A piano that gives the user more control. This version of the piano allows you to use the SHIFT key to type a black key and ⬅︎ or ⮕ to move down the keyboard.
- A piano that goes crazy. This piano doesn't care, what ever you click it won't care about! Plays random sounds with random colours and some very kind messages!
- A global piano, a piano where every can go play and others can hear! Built with Socket.io, I've adpated this project to power this. Try opening up the website in multiple tabs to play around :)
Make something cool? Awesomeeee!!!! Share it on #ship in the Slack and tag me with @sampoder!