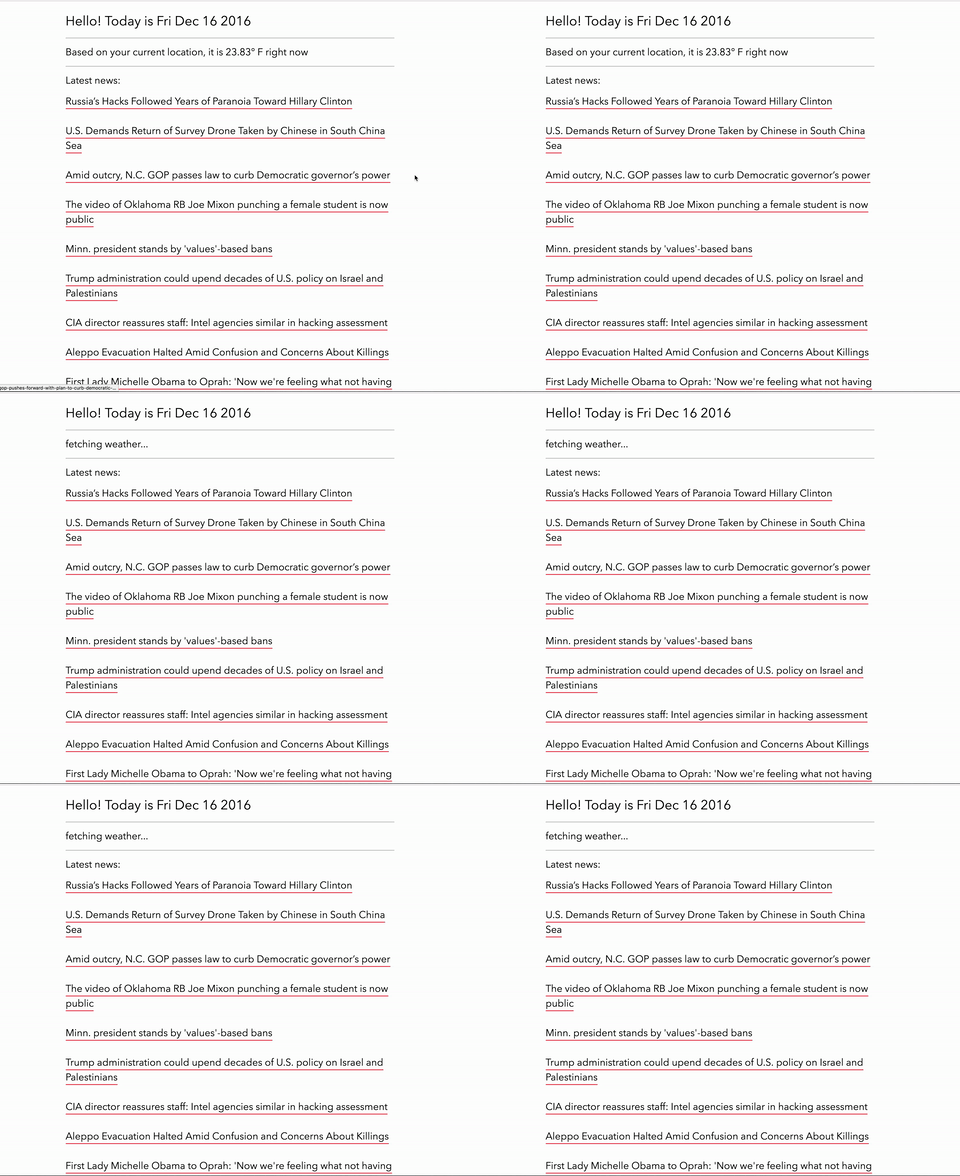
What you'll be building:

Links to a live demo and the final code below. This workshop should take around an hour.
Have you heard of an API? Basically, an API, or an application program interface, is a set of protocols or routines that can help you build a software project. Often, APIs are available to use through companies that allow anyone access to their services. For example, one can make an app to search tweets with a Twitter API, or one could even use the Spotify API to grab the latest music data.
In this project, we'll be building a personal dashboard with a couple widgets that will display:
- The date
- The weather based on the user's current location
- The latest news
We'll be using the OpenWeather API for the weather, and the News API to fetch the latest news.
Part I: Registering for the APIs
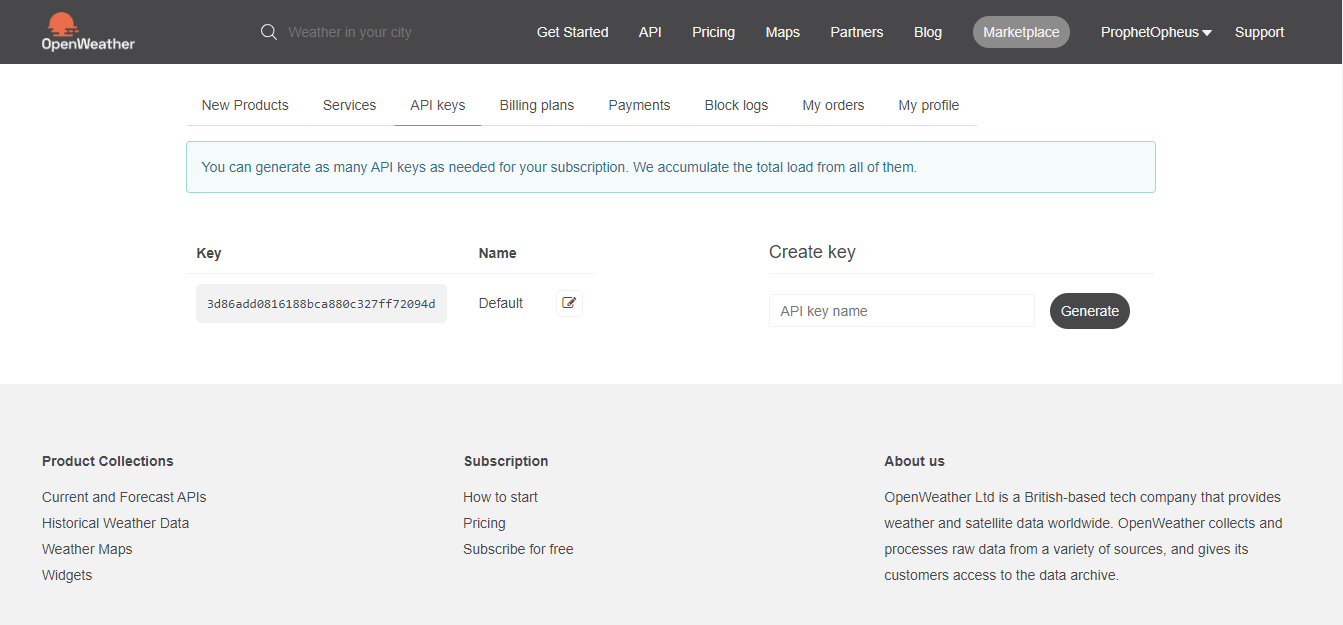
Before we begin, you'll have to sign up for a OpenWeather API key. Go ahead and visit the site and sign up. Once you're logged in, go to the API keys tab, under the successful sign-in notice. It should look like this when you get there:
Take note of your API key (it'll be different for you).
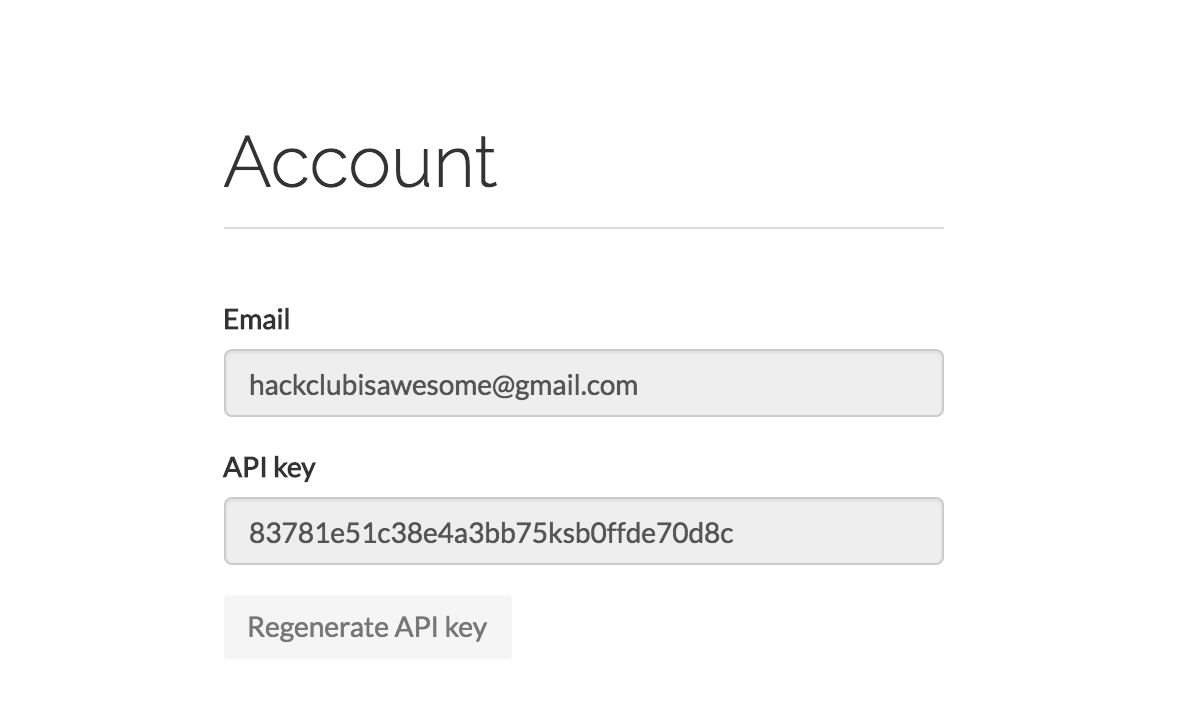
Next, go ahead and sign up for an News API key. Once you sign up, you'll get to a page like this:

Once again, keep your API key handy to use in our JavaScript functions.
Part II: The markup
We'll be keeping our markup really simple. Along with our basic tags, we'll be importing the normalize CSS library and our style.css stylesheet, adding three ids for our date, weather, and news. Lastly, we'll need to link up jQuery and the script.js file where we will write our functions.
<!DOCTYPE html>
<html>
  <head>
    <title>My Dashboard</title>

    <meta name="viewport" content="width=device-width, initial-scale=1" />
    <meta charset="utf-8" />

    <link
      rel="stylesheet"
      href="https://cdnjs.cloudflare.com/ajax/libs/normalize/5.0.0/normalize.min.css"
    />
    <link rel="stylesheet" href="style.css" />
  </head>

  <body>
    <h1>Hello! Today is <span id="date"></span></h1>
    <hr />

    <h2><span id="weather"></span></h2>
    <hr />

    <h2>Latest news</h2>
    <div id="news"></div>
    <p>
      Powered by <a href="https://newsapi.org/">NewsAPI</a> and
      <a href="https://openweathermap.org/">OpenWeatherMap</a>
    </p>

    <script
      src="https://code.jquery.com/jquery-3.1.1.min.js"
      integrity="sha256-hVVnYaiADRTO2PzUGmuLJr8BLUSjGIZsDYGmIJLv2b8="
      crossorigin="anonymous"
    ></script>
    <script type="text/javascript" src="script.js"></script>
  </body>
</html>
Take a look at the Personal Website workshop to learn more about basic HTML markup, if you haven't already.
Part III: The functions
Our JavaScript is where we will actually build our app. Open the file up and and create a function. This function will grab the date, and then use something called function chaining to split the date string and splice it to print only the first four words of the string. If we didn't do this, JavaScript would print out the time too.
function loadDate() {
  var currentDate = new Date()
  var dateString = currentDate
    .toString()
    .split(' ')
    .splice(0, 4) // making the string contain only the first four words
    .join(' ')

  $('#date').text(dateString)
}
Hack Club has published several workshops in JavaScript and jQuery. The That Was Easy workshop uses simple jQuery to communicate with a button element. To learn some basics of JavaScript functions and variables, take a look at the Geometric Pattern or Dodge workshop.
Moving on, we come to the weather function. Let's start by creating a function and assigning variables to our weather id, url, and apiKey.
function loadWeather() {
  var weather = $('#weather')
  var url = 'api.openweathermap.org/data/2.5/weather' // OpenWeather API url
  var apiKey = 'YOUR API KEY' // API key from OpenWeather
}
Now that we've got those variables, we can use HTML5's geolocation API to obtain the latitude and longitude of the user. Then, we'll need to make a API request to the OpenWeather URL. With that JSON data, we can then parse it to display the current temperature of the location with those coordinates. This is how it will work:
function success(position) {
  var latitude = position.coords.latitude // latitude using geolocation
  var longitude = position.coords.longitude // longitude using geolocation

  // API request:
  $.getJSON(
    url +
      '?units=imperial&lat=' +
      latitude +
      '&lon=' +
      longitude +
      '&appid=' +
      apiKey,
    function (data) {
      weather.text(
        'Based on your current location, it is ' + main.temp + '°F right now'
      )
    }
  )
}

// This message is displayed if their is a geolocation error:
function error() {
  alert('Unable to retrieve your location for weather')
}

// calling the geolocation API
navigator.geolocation.getCurrentPosition(success, error)

// the text that will be displayed while the function is making the request
weather.text('fetching weather…')
Note: If you would prefer to use Celsius, change units=imperial in the above code to units=metric\, and the F to a C on the line below.
Here's what the loadWeather() function should look like:
function loadWeather() {
  var weather = $('#weather')
  var url = 'api.openweathermap.org/data/2.5/weather' // OpenWeather API url
  var apiKey = 'YOUR API KEY' // API key from OpenWeather

  function success(position) {
    var latitude = position.coords.latitude // latitude using geolocation
    var longitude = position.coords.longitude // longitude using geolocation

    // API request:
    $.getJSON(
      url +
        '?units=imperial&lat=' +
        latitude +
        '&lon=' +
        longitude +
        '&appid=' +
        apiKey,
      function (data) {
        weather.text(
          'Based on your current location, it is ' + main.temp + '° F right now'
        )
      }
    )
  }

  // This message is displayed if their is a geolocation error:
  function error() {
    alert('Unable to retrieve your location for weather')
  }

  // calling the geolocation API
  navigator.geolocation.getCurrentPosition(success, error)

  // the text that will be displayed while the function is making the request
  weather.text('fetching weather…')
}
At last, we come to our news function. Let's set the variables up similarly to how we did with the loadWeather() function.
function loadNews() {
  var news = $('#news')
  var url = 'https://newsapi.org/v2/top-headlines?sources=the-next-web&apiKey=' // News API url
  var apiKey = 'YOUR API KEY' // API key from News API
}
The API request will be very similar to the loadWeather() request, but this time, we have to get multiple sets of data:
- The title of the articles
- The URL of those articles
That's why we'll need to use a map() method to call every element in the data set. In this case, we'll need the URL of the articles and the titles.
$.getJSON(url + apiKey, function (data) {
  // map() method to call article urls and titles

  var titles = data.articles.map(function (articles) {
    return "<a href='" + articles.url + "'>" + articles.title + '</a>'
  })

  // joining the titles with two line breaks

  news.html(titles.join('<br><br>'))
})

// the text that will be displayed while the function is making the request
news.text('fetching news…')
This is what your loadNews() function should look like:
function loadNews() {
  var news = $('#news')
  var url = 'https://newsapi.org/v2/top-headlines?sources=the-next-web&apiKey=' // News API url
  var apiKey = 'YOUR API KEY' // API key from News API

  $.getJSON(url + apiKey, function (data) {
    // map() method to call article urls and titles

    var titles = data.articles.map(function (articles) {
      return "<a href='" + articles.url + "'>" + articles.title + '</a>'
    })

    // joining the titles with two line breaks

    news.html(titles.join('<br><br>'))
  })

  // the text that will be displayed while the function is making the request
  news.text('fetching news…')
}
Lastly, before we close out of our script.js file, make sure to call all your functions!
loadDate()
loadWeather()
loadNews()
Part IV: Some styling
We still have one last step: we need to make our dashboard look decent! Open up your style.css and let's get to work!
First off, let's center the whole HTML app using margin: 0 auto; and max-width. We'll also change up our font-family.
html {
  max-width: 50em;
  margin: 0 auto;
  padding: 10px;
  font-family: Avenir Next, Helvetica, sans-serif;
}
Then, we can adjust the a tags (or links) to have a border underneath them and making them italicize on hover like this:
a {
  text-decoration: none;
  color: #000;
  border-bottom: 2px solid #e42d40;
}

a:hover {
  font-style: italic;
}
Lastly, we can adjust elements such as font-weight, font-size, and line-height.
h1,
h2,
#news {
  font-weight: 300;
}

#news {
  font-size: 1.5em;
  line-height: 1.5em;
}
Feel free to change up the styles to your liking!
Part V: Publishing, sharing, and improving
To conclude this project, be sure to press Run so that the URL gives the most recent website. Now you're excellent to share your dashboard at https://REPL_NAME--USERNAME.repl.co
Then, make sure to share your project using the #ship channel on Slack!
Of course, this project is just a starting point. Try to add even more of your own widgets using the vast world of APIs!


